Holiday Scrapbook Pages: Layout Ideas for Winter Celebrations
Winter celebrations leave a big stack of busy photos. A firm grid or row, a muted palette and a few hand-cut trees, stars and snowflakes turn them into calm, ordered pages.
Tutorial at a glance
Materials
- Background cardstock
- Patterned paper and solid cardstock offcuts in a muted palette
- Six or seven photo copies cropped to squares
- Paper trimmer
- Scissors
- Ruler and pencil
- Tape runner
- Pen for journaling
Winter celebrations produce more photos in a few days than most months do in total, and many of them are taken indoors, in warm, dim light, with busy backgrounds. Holiday scrapbook pages have to cope with both problems at once: a large stack of pictures and a lot of visual noise inside each one.
The answer is structure. A firm grid or a row, a short palette and two or three hand-cut shapes hold a busy set of photos together better than any amount of themed decoration. The ideas here stay general on purpose, so they fit whichever winter celebration you are recording.
Sort the photos before you plan the page
Group the stack by moment instead of by date: preparation, decorations, the table, the gathering, quiet details. Each group suggests its own page, and small groups can share one.
Then separate the photos by how much attention they need. A clear, well-lit picture of people can be a focal photo. Close-ups of lights, candles, wrapping or a set table work as supporting pictures and survive being cropped small. Blurry or repetitive frames can be left out without losing the story.
Choose a palette that calms busy photos
Holiday pictures are already full of color, so the paper should be quieter than the photos. Deep green, soft red and kraft give a traditional feel without glare. Navy, pale blue and white suit snowy scenes. Cream, kraft and a single metallic accent work for almost anything.
| Palette | Mood | Works with |
|---|---|---|
| Deep green, soft red, kraft | Warm, traditional | Indoor gatherings, decorations |
| Navy, pale blue, white | Cool, calm | Snow, outdoor walks, evening light |
| Cream, kraft, one metallic accent | Neutral, festive | Mixed photos with many colors |
| White, gray, one bright color | Clean, modern | Close-ups and detail shots |
Choose muted versions of each color. Bright red and bright green at full strength compete with each other and with the photos, while darker, softer shades sit back and let the pictures lead. White mats help too: a thin white border separates each print from the paper behind it.
A grid page for many small photos
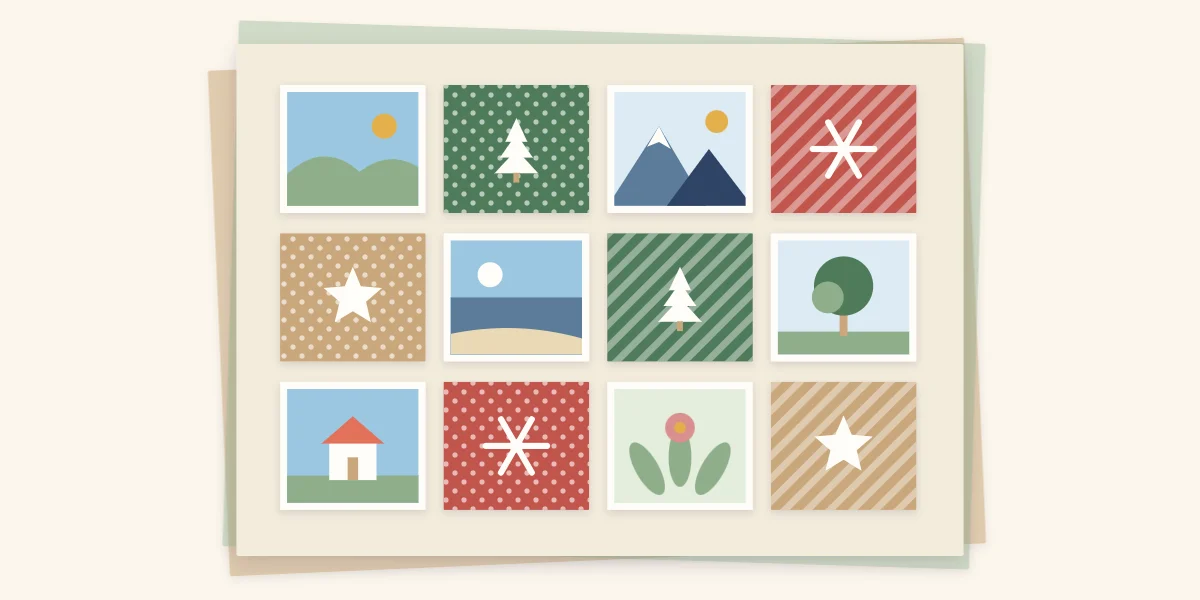
When a celebration leaves you with a dozen good small pictures, a grid of squares fits them on one page without crowding. On a 12 x 12 in (30.5 x 30.5 cm) page, twelve squares of 2 1/2 in (6.4 cm), set in three rows of four with 1/4-inch (6 mm) gaps, leave a margin at the sides and room for a title strip above or journaling below.
- Crop six or seven photos to squares, choosing close-ups that still read clearly at that size. Use copies when the originals are irreplaceable.
- Cut the remaining squares from patterned paper and solid cardstock in your palette.
- Lay all twelve out on the page without adhesive. Alternate photos with paper squares, checkerboard style, so no two busy pictures touch.
- Add a small paper star or tree to two or three of the plain squares and leave the others empty.
- Attach the top-left square first, then work across and down, using a paper strip of the gap width as a spacer.
The paper squares are what make this work. They act as pauses between pictures, so the page reads as an ordered pattern instead of a wall of photos. More arrangements for different photo counts are in the guide to scrapbook photo layouts.
Tip
If the gaps drift as you go, stop and check the row against a ruler before the next square goes down. Uneven gaps are far more noticeable in a grid than in a loose arrangement.
A row of three with a focal photo
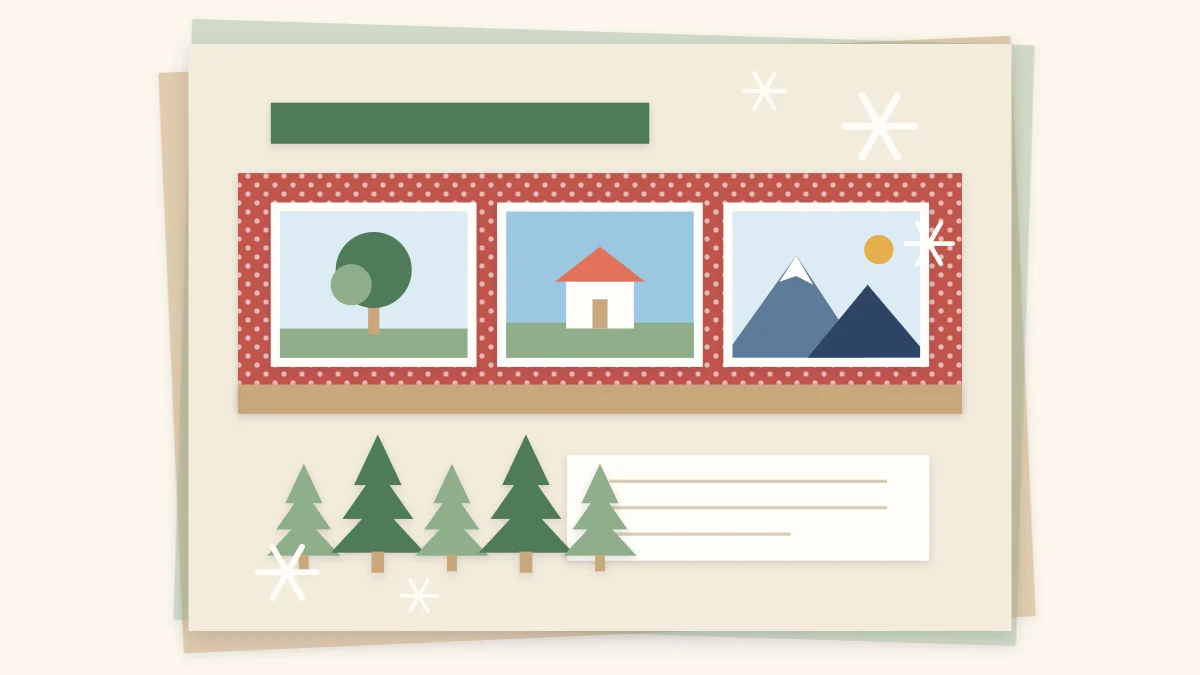
For a smaller group of pictures, place three photos side by side in a row across the middle of the page, with a strip of striped or patterned paper running behind or beneath them. Make the center photo slightly larger, or mat it in a contrasting color, so there is a clear focal photo.
Above the row, a line of simple paper trees or a scatter of snowflakes fills the upper third. Below it, leave space for a title and a block of journaling.
Hand-cut seasonal shapes
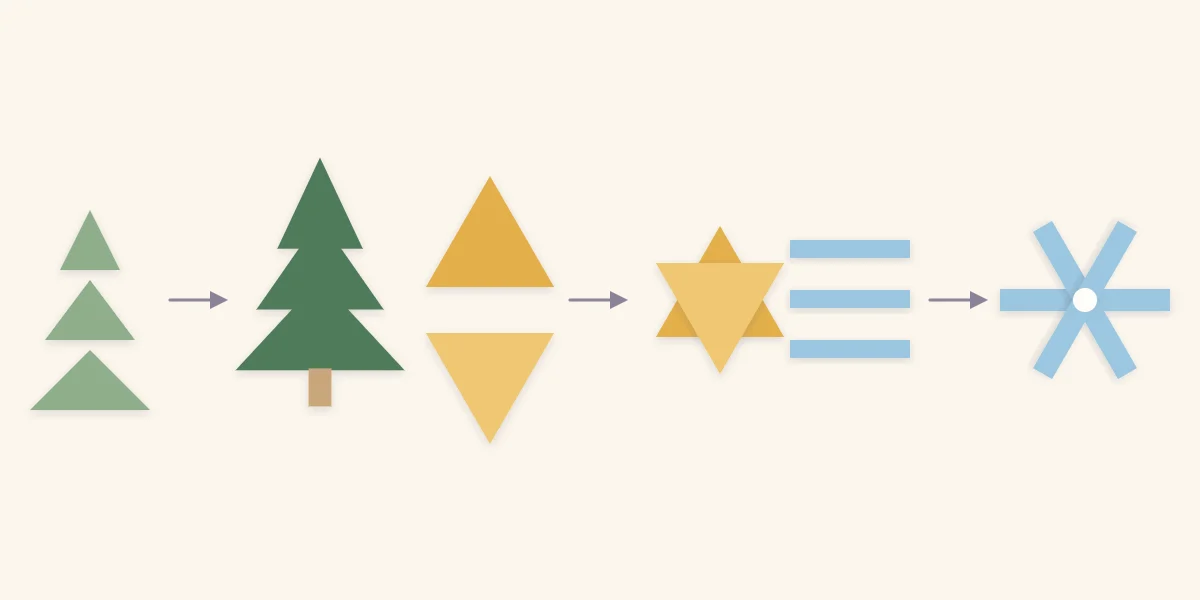
Three shapes cover most winter pages, and each is built from basic pieces cut with scissors or a paper trimmer.
- Tree. Cut three triangles in decreasing sizes and stack them, largest at the bottom, each overlapping the one below. A small rectangle makes the trunk.
- Star. Cut two identical triangles with equal sides. Turn one upside down and glue it over the other so six points show.
- Snowflake. Cut three narrow strips of equal length and cross them at their centers, spacing the six arms evenly.
Cut several of one shape in two or three sizes and use them together. A row of five trees or a cluster of three stars looks planned, while one of every shape looks scattered.
Watch out
Small triangles and narrow strips put fingers close to the blade. Cut them from a larger piece that is easy to hold, keep fingers behind the trimmer blade, and supervise children with scissors.
Journaling for holiday pages
Photos from a celebration tend to look alike from one year to the next. The words are what set them apart. Record the year, the place, who was there, and one or two specifics the pictures cannot show: what the weather was like, what was on the table, what was different this time.
A short list often suits these pages better than a paragraph. If space is tight, write on a tag or a card tucked behind a photo; the scrapbook journaling ideas show several placements.
Mementos and consistency
Cards, gift tags and wrapping paper are natural additions. Trim a square of wrapping paper for the grid, or keep a card in a pocket page protector beside the layout instead of gluing it down. Bulky items are better photographed than attached.
If you make holiday pages every year, repeat one structure, such as the twelve-square grid, and change only the palette. Over time the pages form a matching set. Pages for other occasions can follow the same thinking; see celebration scrapbook pages for birthdays, weddings and graduations, and seasonal scrapbook layouts for the rest of the winter photos.
Frequently asked questions
How many photos should go on one holiday scrapbook page?
It depends on the structure. A row layout suits three photos with one clear focal photo, while a grid of small squares can hold six or seven pictures mixed with paper squares. If you have more than that from one moment, spread them over a second page instead of shrinking them further.
What colors work for winter celebration pages?
Muted shades work better than bright ones because holiday photos are already colorful. Deep green, soft red and kraft feel traditional, navy and pale blue suit snowy scenes, and cream with kraft is a neutral option for mixed photos. Thin white mats help separate busy pictures from the paper.
How can I include cards and wrapping paper?
Flat pieces such as a trimmed square of wrapping paper or a gift tag can go straight onto the page. Thicker items such as folded cards sit better in a pocket page protector beside the layout. Photograph anything bulky and use the picture instead.