Handmade Scrapbook Embellishments from Paper You Already Have
Turn cardstock offcuts into layered flowers, accordion rosettes, banners, bows and leaves that match your page exactly.
Tutorial at a glance
Materials
- Cardstock scraps in two or three colors
- Patterned paper scraps
- Small sharp scissors
- Pencil and ruler
- Round objects to trace or circle punches
- Scoring tool such as a bone folder
- Liquid glue with a fine tip
- Tape runner
A sheet of cardstock, scissors and glue are enough to make handmade scrapbook embellishments that fit a page better than most ready-made ones. Because they are cut from the same paper as the mats and strips already on the layout, the colors match exactly, and you can make each piece the size the page needs.
Offcuts are the ideal material. Flowers, rosettes, banners and leaves all use small pieces, so the strips and corners left over from cutting mats are usually all you need. Two projects are explained step by step below, followed by quicker shapes for filling out a cluster.
What you need
Use cardstock for anything that has to hold a shape, such as flower layers, bows and pinwheels. Thinner patterned paper folds more easily and suits rosettes and small banners. Beyond paper, gather:
- Small, sharp scissors
- A pencil and a ruler
- Round objects to trace, such as bottle caps and jar lids, or circle punches if you have them
- A scoring tool: a bone folder, an empty ballpoint pen or the back of a butter knife
- Liquid glue with a fine tip for small joins, and a tape runner for flat pieces
Liquid glue is the better choice for folded and stacked pieces because it grips edges that a tape runner cannot reach; the guide to scrapbook adhesives compares the types. Scissors and scoring tools have sharp points, so supervise children closely.
Make a layered paper flower
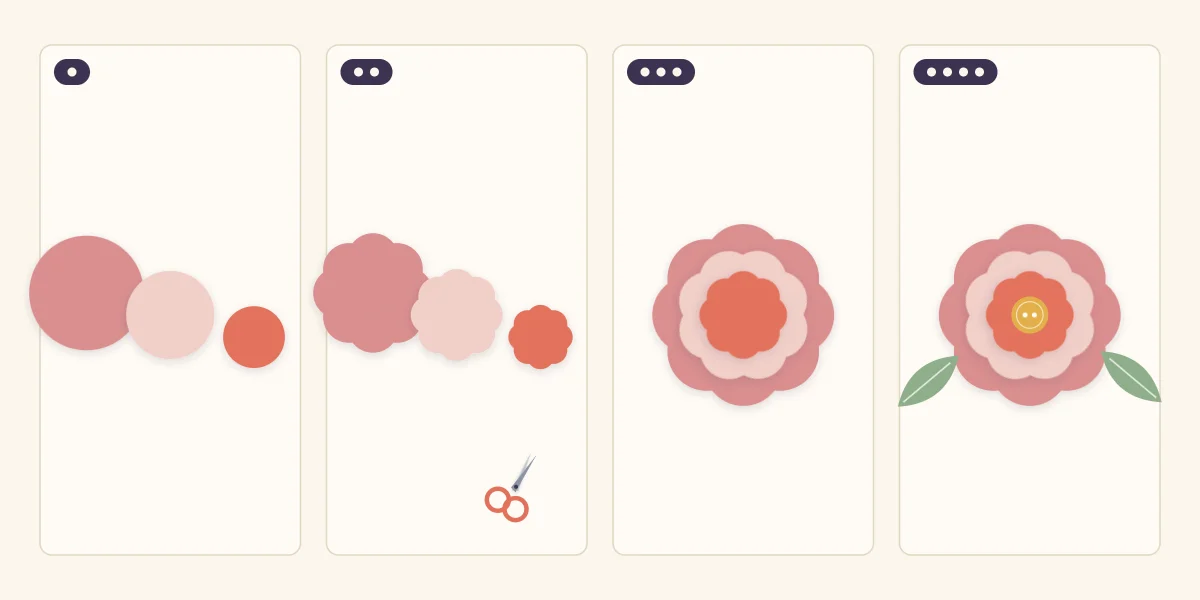
This flower is three notched circles stacked on top of each other. It stays almost flat, which makes it kind to page protectors.
- Cut three circles of decreasing size. Trace or punch circles of about 2 inches (5 cm), 1 1/2 inches (3.8 cm) and 1 inch (2.5 cm). Use one color in three shades, or three papers from the page.
- Notch the edges into petals. Snip small V-shaped notches at even intervals around each circle, cutting only a short way toward the center. Six to eight notches give a rounded petal shape. Curl each petal gently upward over a pencil if you want more lift.
- Stack the layers off-set. Glue the medium circle onto the large one and the small one on top, turning each so its petals sit over the notches of the layer below. The off-set is what makes every layer visible.
- Add the center. Punch or cut a small circle of contrasting paper, about the size of a shirt button, and glue it in the middle.
If the flower looks like a plain stack of discs, the notches are too shallow or the layers are lined up. Cut the notches a little deeper and rotate the layers.
Make an accordion rosette
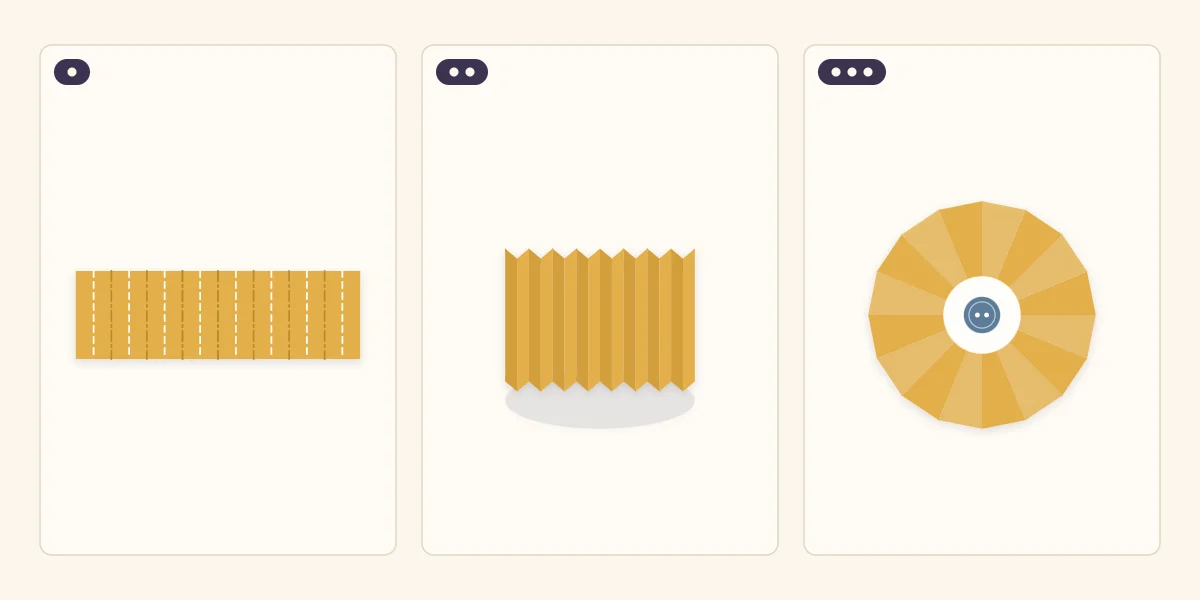
A rosette is a long strip folded back and forth, joined into a ring and pressed flat. The finished rosette is about twice as wide as the strip, so a strip 1 inch (2.5 cm) wide makes a rosette roughly 2 inches (5 cm) across.
- Score and fold the strip. Cut a strip 1 x 12 in (2.5 x 30.5 cm). Score a line across it every 1/4 inch (6 mm), then fold along the lines in alternating directions to make even accordion pleats.
- Join the strip into a ring. Glue the two short ends together, overlapping one pleat, so the folded strip forms a pleated tube. Let the glue set before going on.
- Press it flat and fix the center. Stand the ring on the table and push the top edge down and inward until it collapses into a flat disc. Hold it there and glue a paper circle over the middle. Add a second circle on the back for strength.
The rosette will spring open until the center circle is firmly attached, so use a generous dot of liquid glue and keep it pressed until it holds. Uneven pleats are the usual cause of a lopsided rosette, which is why scoring before folding is worth the effort. If the ring will not close into a full circle, the strip is too short for its width; glue on a second pleated strip.
Quick shapes from small scraps
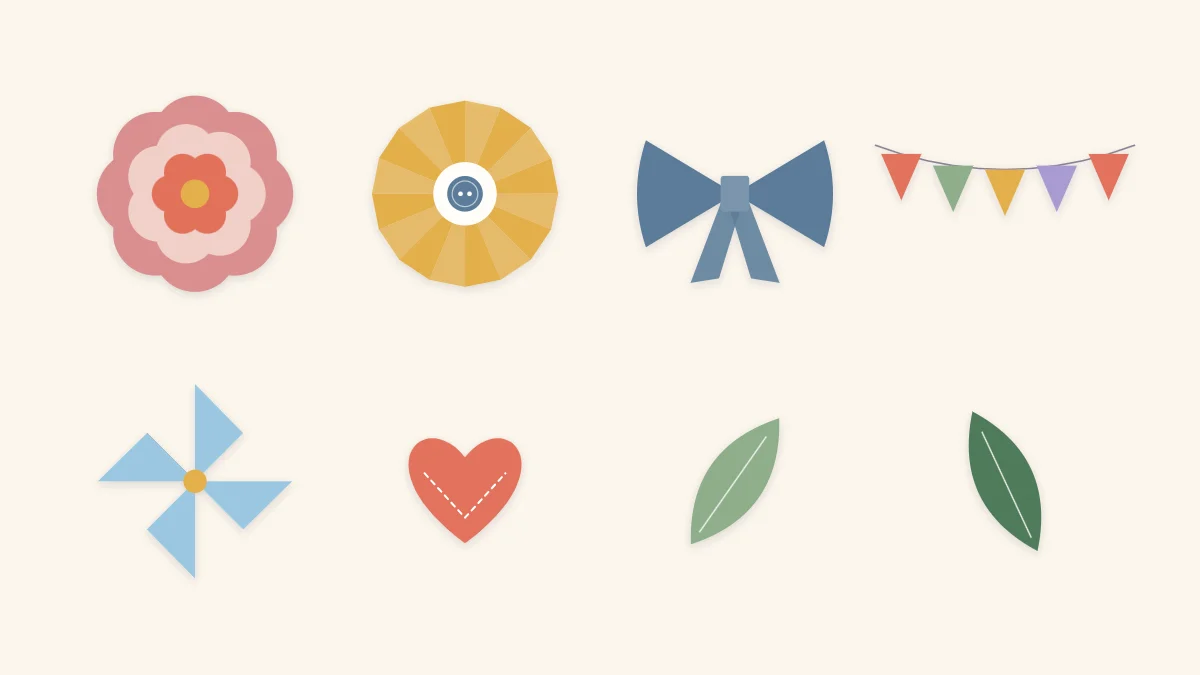
- Pennant banner. Cut small triangles or notch the ends of short rectangles, then glue them in a row along a length of thread or a thin paper strip.
- Hearts. Fold a small rectangle in half, cut half a heart against the fold and open it. The fold guarantees both sides match.
- Leaves. Cut a pointed oval, fold it lengthwise and unfold for a center vein. Tuck leaves under a flower.
- Bow. Glue the two ends of a strip to its center to form two loops, lay it on a shorter strip with notched ends for the tails, and wrap a narrow strip around the middle.
- Pinwheel. Cut a square, slit it from each corner halfway to the center, fold every other point to the middle and glue. Cover the center with a small circle.
More uses for small pieces are collected in these paper scrap ideas.
Paper and thickness at a glance
| Embellishment | Best paper | Thickness on the page |
|---|---|---|
| Layered flower | Cardstock | Low |
| Accordion rosette | Patterned paper or light cardstock | Medium |
| Pennant banner, hearts, leaves | Any scraps | Flat |
| Bow | Light cardstock | Medium |
| Pinwheel | Double-sided patterned paper | Medium to high |
Place them on the page
Handmade pieces are quick to produce, and the temptation is to use all of them. Group them instead. One cluster of a flower, two leaves and a small banner at the corner of the focal photo does more than the same pieces spread evenly around the page, a problem covered in the guide to common scrapbooking mistakes.
Vary the sizes within a cluster, with one large piece, one medium and a few small, and let the pieces overlap each other and the edge of the mat. The guide to layering paper without bulk explains how to stack them so each one shows.
Tip
Keep thick pieces such as rosettes and pinwheels away from the spot directly opposite a thick piece on the facing page. Two raised embellishments pressing together can dent the photos between them when the album is closed.
Frequently asked questions
What paper works best for handmade embellishments?
Cardstock suits pieces that must hold a shape, such as flower layers and bows. Thinner patterned paper folds more easily and is better for rosettes and small banners. Offcuts from the papers already on your page give the closest color match.
Why does a paper rosette keep springing open?
The pleats push outward until the center is fixed. Use a generous dot of liquid glue under a paper circle in the middle, hold the rosette flat until the glue grips, and add a second circle on the back for extra strength.
Will handmade embellishments make a page too thick?
Flat pieces such as banners, hearts, leaves and layered flowers add very little thickness. Rosettes, bows and pinwheels stand higher, so use them sparingly and avoid placing them directly opposite a raised piece on the facing page.